
I'm creating a new websocket server in Java just to see what it takes, and for that I will be using IntelliJ IDEA by JetBrains. Follow along if you wish to experiment with WebSockets in Java EE, and need a place to start.
First we need to install the Java SDK, get the latest version from Oracle's download page.
Then download Java EE from its download page.
Unpack the contents and put them in a reasonable path. In my case I've put them at D:\\Program Files\\Java\\java_ee_sdk-7u3
Then we install IntelliJ IDEA from JetBrain's download page. Of course you don't have to do this if you already have IDEA installed.
Start IntelliJ IDEA. We are greeted by the welcome screen since this is a fresh install. The first thing we do is edit our project defaults. If you are already comfortable with your defaults, keep them.
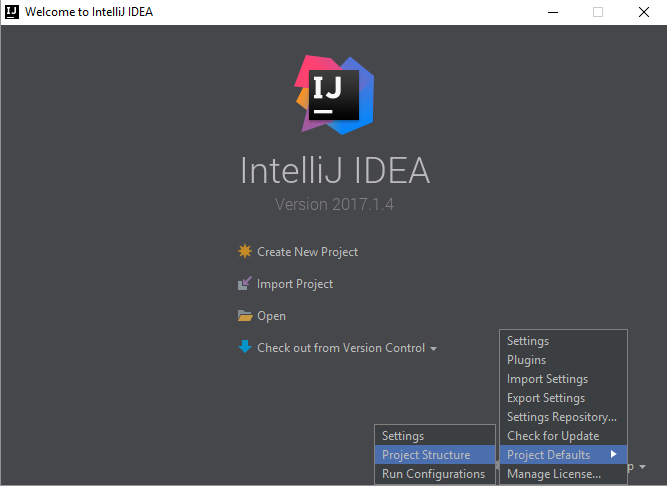
Under "Project Settings" > "Project" We add a new SDK by pressing the "New..." button and clicking "JDK".
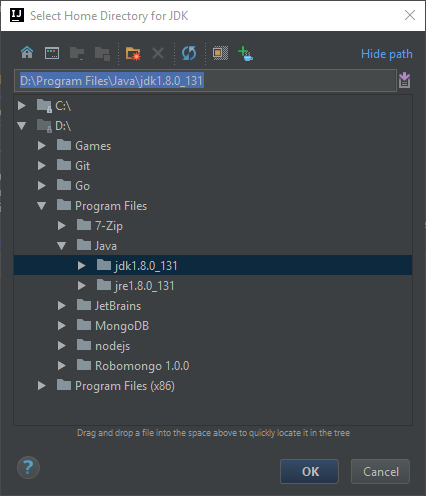
Then browse to your JDK folder. If you are on Windows, it should have a name and path somewhat similar to mine: D:\\Program Files\\Java\\jdk1.8.0_131. The version number may vary depending on what version you have installed.
This should then be added and automatically selected in your project settings.
Close the dialog up and press "Create New Project" in the welcome dialog.
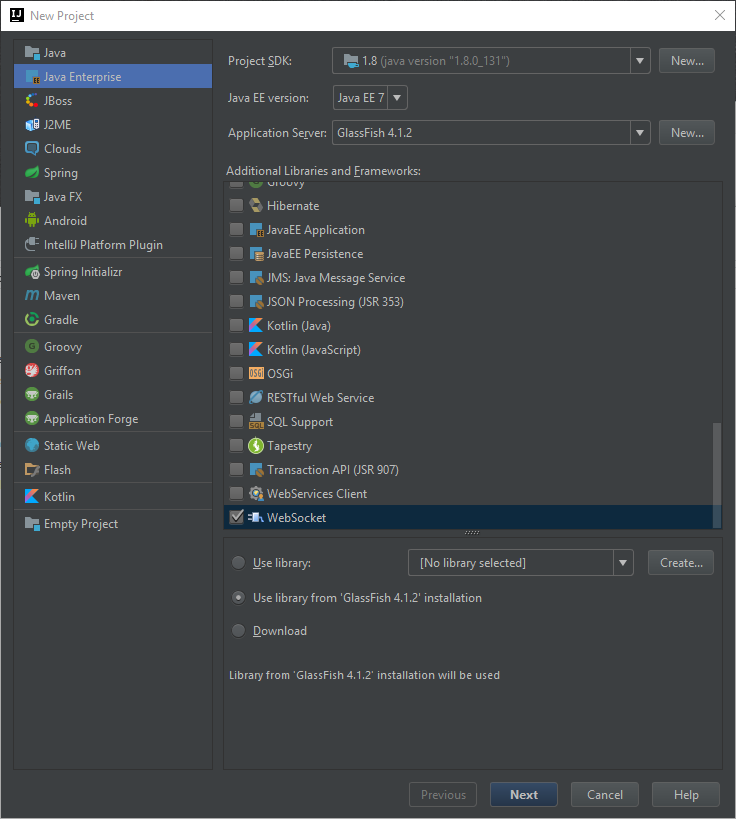
Choose "Java Enterprise", and ensure that the Project SDK is set to our previsouly set SDK.
Then press "New..." next to the Application Server drop-down.
Here we select "GlassFish Server" and browse to the glassfish server folder. On my system this is located at D:\\Program Files\\Java\\java_ee_sdk-7u3\\glassfish4.
After browsing it should show you the glassfish server version, this confirms that you have browsed to the correct folder.
Make sure that GlassFish is selected as Application Server.
Then tick off the "Web Application" and "WebSocket" checkboxes under Additional Libraries and Frameworks.
Under WebSocket select the option "Use library from 'GlassFish 4.1.2' installation". The version may differ according to what you have installed.
Press Next and name your project, I named mine "ChatServer", and press Finish.
This should open up the project for you.
It will have made some new files in our project. We can go ahead and delete the "index.jsp" file under the "web" folder, we won't be needing it.
Now let's create a new package to hold our source code. Right-click on the "src" folder and press "New" > "Package". Name your package according to your project. Java naming convention wants you to name packages with a domain you own. But if no one else will be using your code, you can call it whatever you want.
I will however name my package "dk.jckjaer.chatserver", since I will be referencing my jckjaer.dk domain, followed by my project name.
Now that you have your package, create a new class inside it. Right-click the package and select "New" > "Java Class". Name the class "ChatServer". This will be our main WebSocket server.
Paste the following code into your new class.
import javax.websocket.*;
import javax.websocket.server.ServerEndpoint;
import java.io.IOException;
import java.util.HashMap;
import java.util.Map;

@ServerEndpoint("/ws")
public class ChatServer {
    private Map<String, String> usernames = new HashMap<String, String>();

    @OnOpen
    public void open(Session session) throws IOException, EncodeException {
        session.getBasicRemote().sendText("(Server): Welcome to the chat room. Please state your username to begin.");

    }

    @OnClose
    public void close(Session session) throws IOException, EncodeException {
        String userId = session.getId();
        if (usernames.containsKey(userId)) {
            String username = usernames.get(userId);
            usernames.remove(userId);
            for (Session peer : session.getOpenSessions())
                peer.getBasicRemote().sendText("(Server): " + username + " left the chat room.");
        }
    }

    @OnMessage
    public void handleMessage(String message, Session session) throws IOException, EncodeException {
        String userId = session.getId();
        if (usernames.containsKey(userId)) {
            String username = usernames.get(userId);
            for (Session peer : session.getOpenSessions())
                peer.getBasicRemote().sendText("(" + username + "): " + message);
        } else {
            if (usernames.containsValue(message) || message.toLowerCase().equals("server"))
                session.getBasicRemote().sendText("(Server): That username is already in use. Please try again.");
            else {
                usernames.put(userId, message);
                session.getBasicRemote().sendText("(Server): Welcome, " + message + "!");
                for (Session peer : session.getOpenSessions())
                    if (!peer.getId().equals(userId))
                        peer.getBasicRemote().sendText("(Server): " + message + " joined the chat room.");
            }
        }
    }
}
Remember to keep your package definition in the top of the file.
This is a simple websocket setup where we listen to new clients, messages and leaving clients.
We also save client usernames in a HashMap defined as "usernames". Our endpoint is defined as "/ws", this is where we will reach our websocket server.
Now to actually connect, we will be making a simple html file with some javascript inside.
Add a new html file to your "web" folder by right-clicking and selecting "New" > "HTML File", and name it "index".
Paste the following code into your new index.html file.
<!DOCTYPE html>
<html lang="en">
<head>
    <meta charset="UTF-8">
    <title>Chat</title>
</head>
<body style="margin:0;">
<textarea title="Chat Log" id="log" readonly
          style="display: block; width: 100%; height: 600px; resize: none; margin: 0; padding: 0; border: 0;"></textarea>
<input title="Chat Input" id="input" type="text" style="display: block; width: 100%; border-width: 1px 0 1px 0;"
       autofocus/>
<script>
    var ws = new WebSocket("ws://localhost:8080/ChatServer_war_exploded/ws");
    ws.onmessage = function (event) {
        console.log(event.data);
        document.getElementById("log").value += "[" + timestamp() + "] " + event.data + "\n";
    }

    document.getElementById("input").addEventListener("keyup", function (event) {
        if (event.keyCode === 13) {
            ws.send(event.target.value);
            event.target.value = "";
        }
    });

    function timestamp() {
        var d = new Date(), minutes = d.getMinutes();
        if (minutes < 10) minutes = '0' + minutes;
        return d.getHours() + ':' + minutes;
    }
</script>
</body>
</html>
This is a simple site with a textarea for showing the chat log, and an input to write messages to the server.
We listen for enter on the input, and send whatever is inside to the server.
There is some added styling to make the whole thing a tiny bit more polished.
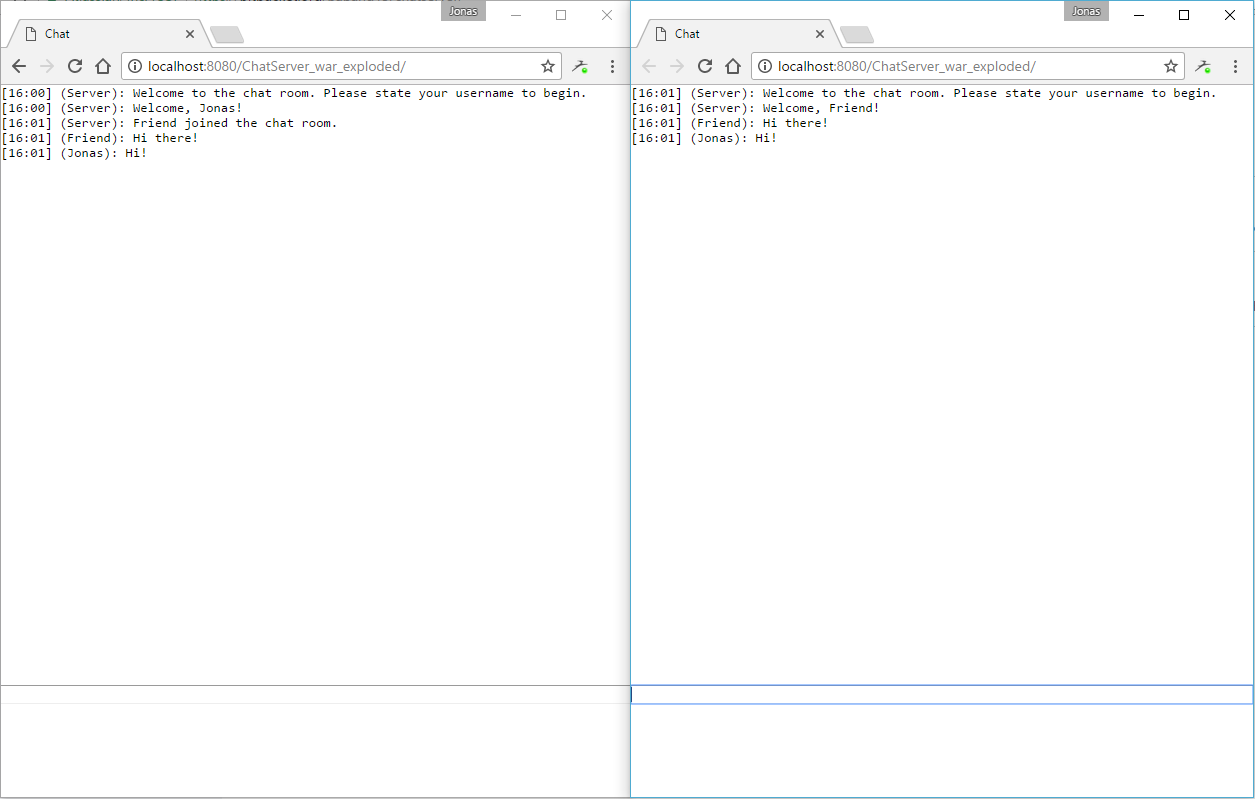
We connect to our project on local port 8080, with the following URL ws://localhost:8080/ChatServer_war_exploded/ws. The /ws part is our endpoint from before.
This should be enough for you to run the project, and get a working WebSocket chat server.
I hope this gives a good place to start, so feel free to experiment.
I have the code hosted on Bitbucket, so you can browse it or clone it from there if you wish.