
I've changed my VPN provider to NordVPN, and therefore wanted to setup my Synology DS414 to connect through it. Here is how you can do it too.
First, i found that NordVPN offers a "recommended servers" tool on their site. You can find it under "Servers" on their website, or follow this link. Upon visiting the site, you will see a recommended server to use. Under the "Show available protocols" link, you can download the OpenVPN file you will need.
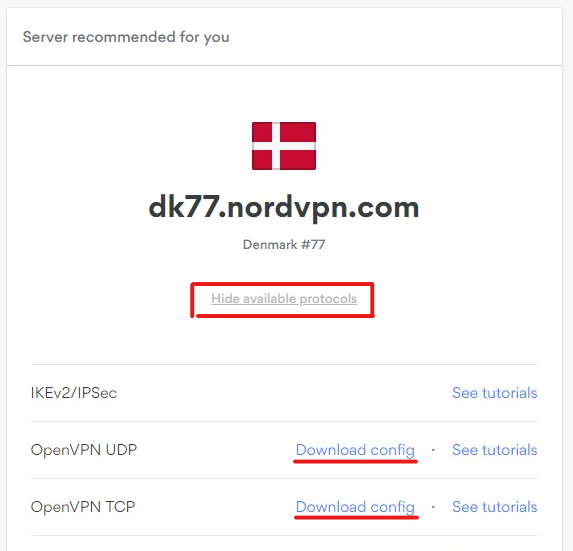
You have a choice between UDP or TCP. Choose UDP for speed, or TCP for reliability.
Press "Download config" on the one you want. I chose TCP, since the server location is very close to me and i don't expect to encounter any speed issues.
Secondly, i'd recommend you download this archive from NordVPN. It contains a certificate that we will need later.
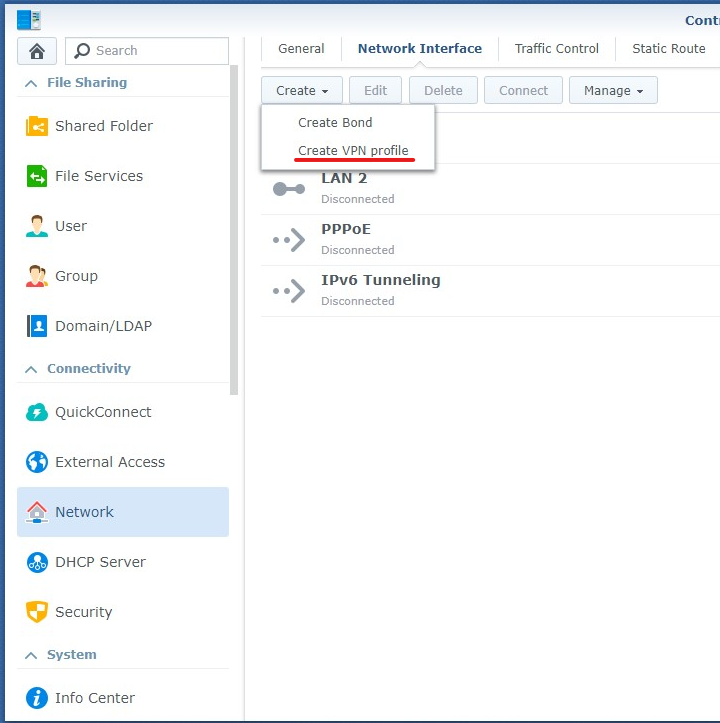
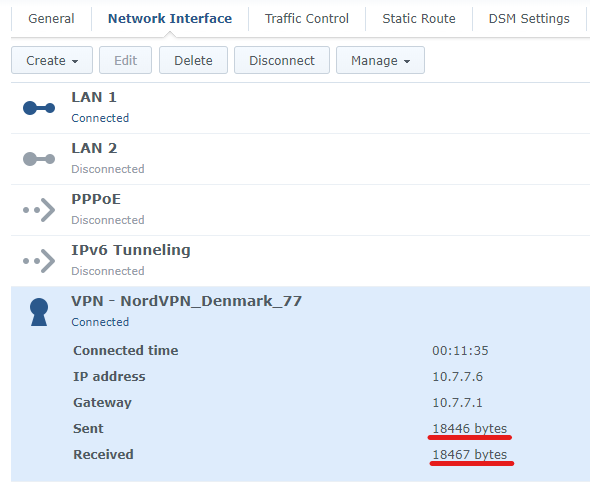
Next, log onto your NAS and open the "Control Panel", select "Network" and switch to the "Network Interface" tab. Click the "Create" drop-down button, and click "Create VPN profile".
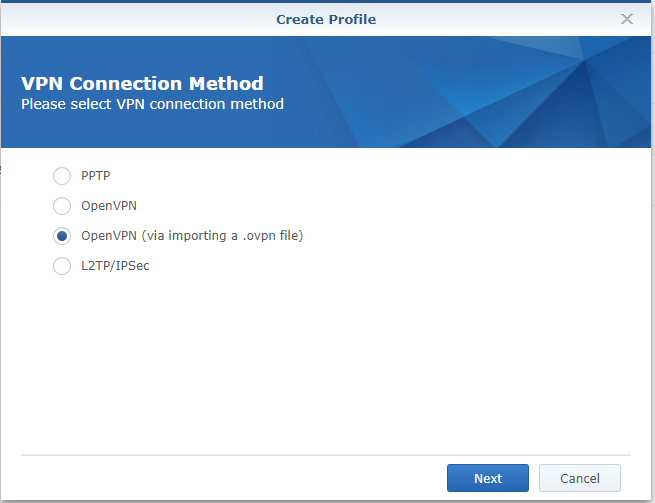
In the wizard, select "OpenVPN (via importing a .ovpn file)", and press Next.
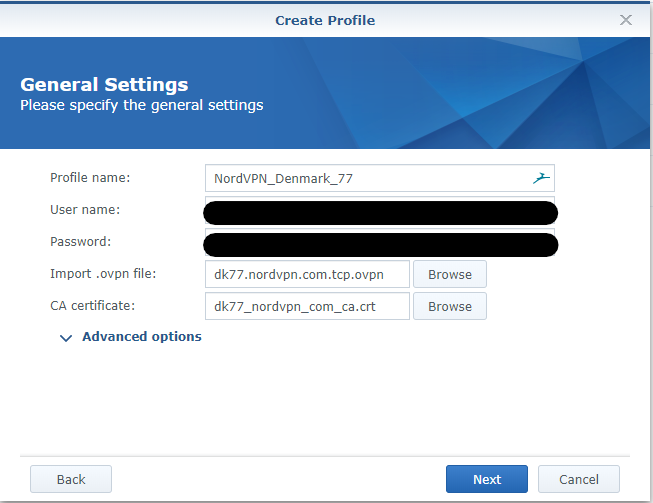
On the next page, give it a fitting name. I chose to name mine "NordVPN_Denmark_77" after the name of the server i will be connecting through.
Enter your NordVPN username and password, then import the .ovpn file you downloaded previously from NordVPN's site.
For the CA certificate, unpack the "servers" archive you downloaded previously. Here you will find a .crt file that fits the recommended server that you can select. For example, i will be using dk77, so the file i select will be "dk77_nordvpn_com_ca.crt".
Then, press Next.
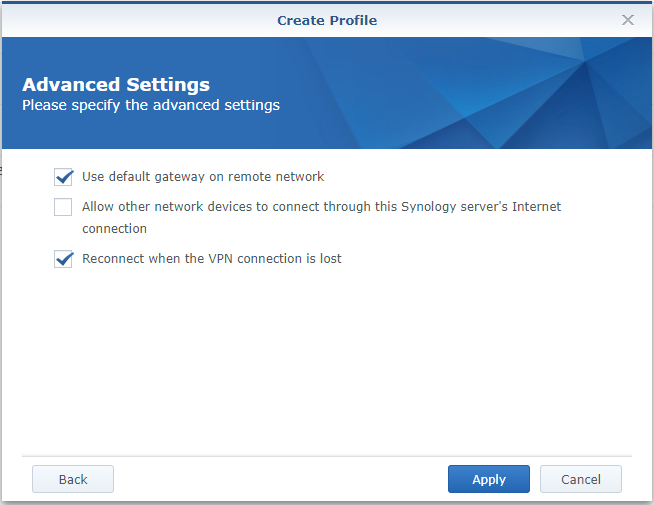
Select "Use default gateway on remote network" and "Reconnect when the VPN connection is lost". I have no use for the second option of allowing network devices to connect through my NAS, so i won't be selecting that. You may do so if you need it.
Then press Apply.
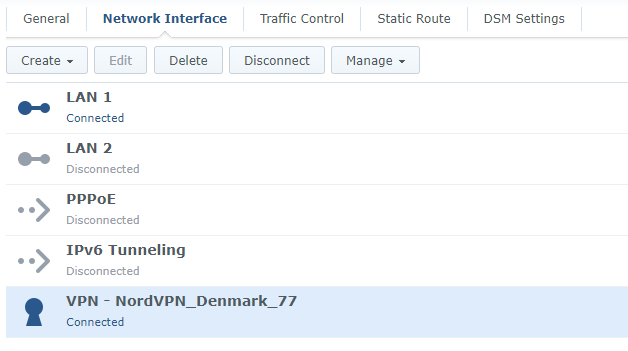
Now you should be able to select the newly created VPN connection and click the "Connect" button. After a little while, the connection should state "Connected".
Test the connection
Next, you should test that the connection is secure and functional.
Make sure you have "Download Station" installed on your NAS. We will be using TorGuard's "Check My Torrent IP" tool to verify our VPN connection. Go to their site here and download the torrent magnet link by right-clicking the big green "Download Now" button (i know, it looks suspicious, but trust me on this one) and clicking "Copy link address".
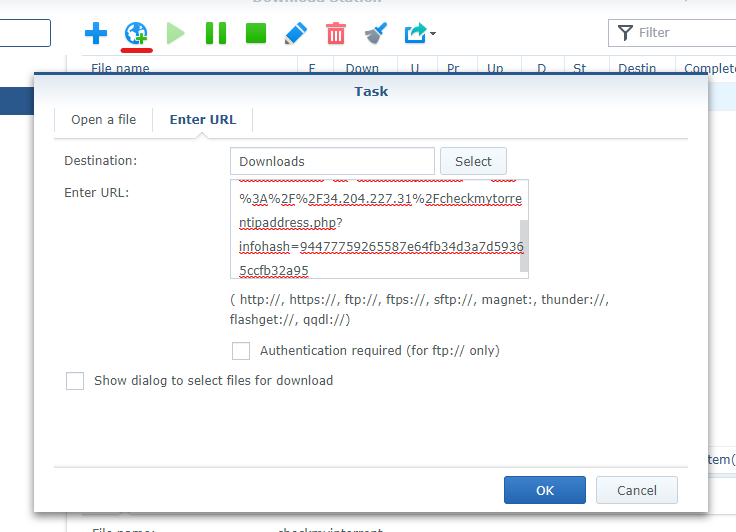
Now, in Download Station, create a new task via URL by clicking the little globe with a green plus next to it. Paste the link you got into the "Enter URL" box, and press OK.
Give it a little time to start the download. And you should then be able to see your transfer on the Check My Torrent IP tool. If you closed the site, you can also view the IP by clicking the torrent in Download Station and selecting "Tracker". Then it is shown under "Status".
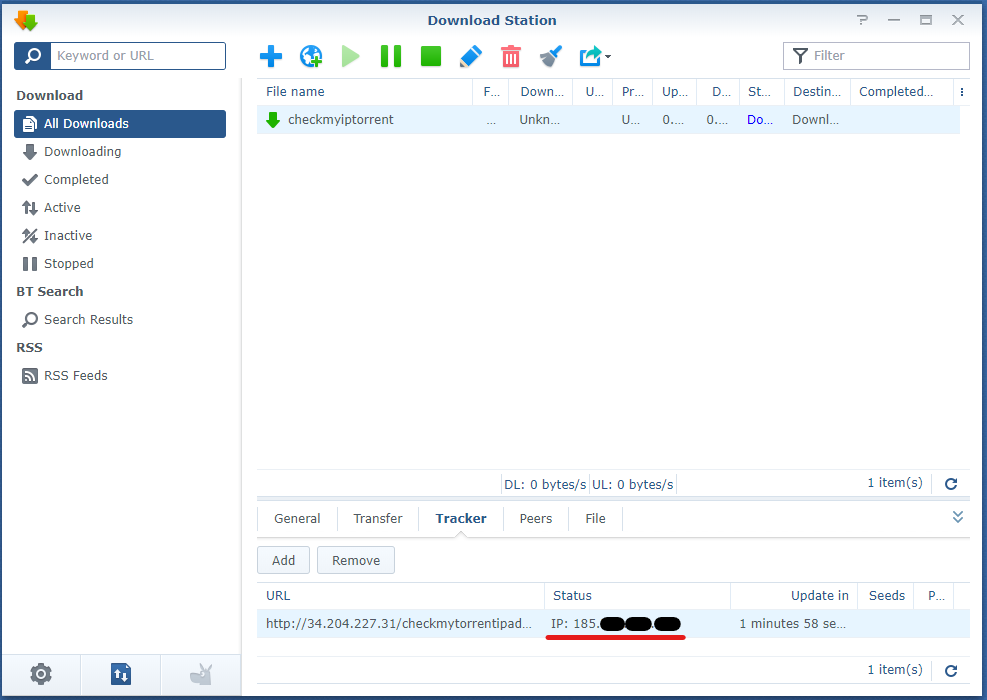
Check that the IP shown is not your public IP given to you by your ISP.
Additionally, you can check that your VPN connection under Network in Control Panel has bytes received and sent.
That's it. Your NAS should now be connected through NordVPN. I hope this was helpful. :)